Grand Canyon Pattern

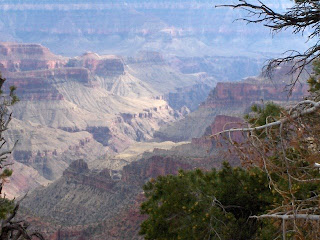
I've been working on a landscape quilt of the Grand Canyon. Here's the photo inspiration. It's taken from the north rim of the Grand Canyon back in 2006.

These are the fabrics I selected, trimmed down to a more manageable size. I numbered these pieces with stickers to keep myself organized.
I trim off the freezer paper templates one at a time. This also helps me keep things in order and I don't lose pieces this way. Here I've trimmed off template #1. The fabric behind the template isn't the fabric for this piece - I just needed something under the template to keep the glare from the flash off the photo.
All the templates are ironed onto the fabrics.
The templates are all glue-basted together.
This is a photo of the back of the quilt.
This is the front of the quilt after the freezer paper templates are removed.
I'm not thrilled with the way this quilt came out. I think the red fabrics are too close in color and I need more contrast between them. I also want to remove the large green fabric in the lower right-hand corner and change that to more "canyon" type fabrics. When I compare this quilt to the photograph, there is a land mass in this area that I missed - I turned it all into brush instead of the landform.
So this is my process even though this quilt isn't the success that I hoped for. One great thing about this method is that the pieces are easy to remove and replace because they are glue-basted. All I have to do is pull off the pieces I don't like and replace them. The templates are reuseable - if you keep them around, which I didn't. I'll just retrace them onto freezer paper from the master pattern and chose new fabrics.
Susan


Comments