Posts

Showing posts from 2010

Personal Quilt

Image
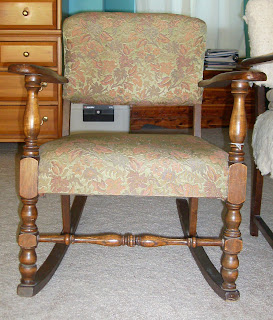
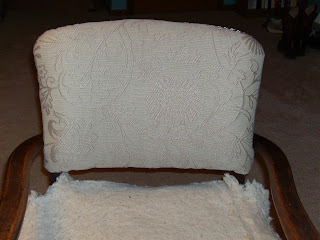
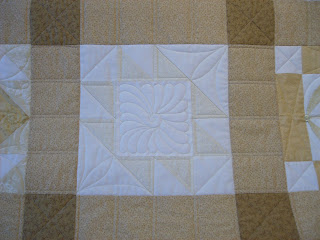
I don't have a lot of time to work on my own projects much less a large quilt for my own bed. However, this past summer I decided to redecorate the master bedroom and painted the walls using the linen wall hanging as an inspiration for a color scheme. I also reupholstered my grandmothers arm chair and purchased another chair to coordinate. That chair is still waiting for a change of upholstery fabric. Below is a photo of my new quilt to coordinate with the paint color. I made a simple pieced rail fence out of 2 jelly rolls and added some batik fabrics to make 2 wide borders. It all went together quickly. The quilting in the body of the quilt is a simple overall, freehand swirl using a variegated thread from YLI. The inner border was quilted with a piano key design, and the outer border was quilted with freehand feathers.  The room is starting to come together. I need to finish the other chair and quilt the linen piece on the quilt rack. Perhaps I'll be completely fini

Purse Design

Image
With Christmas arriving in just 2 days, I've been busy finishing up a few gifts. This is a purse using my hand-dyed fabrics. It is similar to the blue bag I made a while back, but with this one I box-pleated the bottom of the bag and added 3 pockets to the lining. I also changed the front just a bit by leaving out the pleats.

Sunrise Dyeworks on Etsy

With all the hand-dyed fabric I've created this year accumulating in my studio, I decided to take the plunge and open an Etsy shop. I'm getting the hang of using the Etsy shop but it's taking me a while to get everything listed. I currently have 2 pieces listed, but will add more soon. Click on the link on the side bar to go directly to my shop or click SunriseDyeworks  .

Simple Heart Medallion

Image
I have been designing quilting patterns for use with computerized quilting machines as well as with hand-guided machines. This is one of my latest designs. Since I don't have a computerized machine myself, I design patterns that can be used with or without a computerized machine. This particular design is one that I have used with my longarm machine and looks really good in wholecloth quilts or in alternate blocks in pieced quilts. Feel free to download this design and use it in your own quilts.

Crochet Projects

Image
In the evenings, I often sit on the sofa and knit or crochet while DH watches TV. Here are two projects I recently finished. This sweater fits a toddler and was crocheted using Softee Baby yarn by Bernat. The pattern was one of the free patterns on display at the shop. This sweater uses the same yarns and is crocheted in one piece. I used a pattern called "The World's Easiest Sweater". I had to tweak the pattern in order for it to fit my youngest DD.

Pretty Floral Quilt

Image
This is a photo of a block in a quilt I finished for Sharon. The colors are soft green, pink, yellow, and cream.  It is a very refreshing, calming quilt and it was very much a pleasure to quilt. Thanks Sharon!

A Gift From a Friend

Image
Two years ago, a friend at church passed away. A year later her husband also passed away and their daughter gifted the church some of her mother's quilting, sewing and crafting items. I was given these quilt blocks that her mother had made. While I was visiting the daughter this summer, she asked me look at the quilts her mother had made and show her which ones were the best to keep and pass on to family members. There were some beautiful, vintage quilts in the collection as well as some that were new but well made and destined to become heirlooms in the future. These 9 blocks will be made into a small quilt and cherished as a gift from a friend.

Colors of Autumn

Image
Back in September, my daughters and I took a nature hike to look at the changing colors of autumn. It was a bit early in the season, but some of the Sumac was turning red. Up against the green leaves, that red really pops. These bushes were in the yellow and orange stage for the most part. Now most of the trees are past their peak colors and I've missed getting out and taking more photos. Life does get busy at times.

One Chair Completed

Image
My grandmother's chair is finally done! I finished the upholstery this past weekend after DH replaced the broken wire pieces in the seat for me. I like the texture in this fabric. I added piping to the back side of the chair - no photo of that. I'm debating on whether or not to add upholsterer's tacks to the back. I probably will since I have them on hand. I replaced the foam in the seat with 2 layers of "NuFoam" and added an additional layer of batting to give the seat more cushion. It's very comfortable now. Now to get around to reupholstering the other chair!

Girls Day Off

Image
DD#1 and I took the day off today and took a field trip to the St. Louis Art Museum. The idea was to take time and do some sketching of the exhibits for art class. The museum is under construction right now and some of the exhibits are not on display. There were enough exhibits of paintings and artifacts to keep us busy for 3 hours, though. This is a photo of the lake from the front of the museum.   This is the hill that leads from the front of the museum to the lake. DH and I would sit on this hill the first year we were married and watch people fly kites. There was also an annual hot air balloon show that was launched here. About 30 years ago, DH and I lived across the highway from Forest Park where the St. Louis Zoo and the Art Museum are located. We were dirt poor, just married, and I was finishing up my last year in nursing school at the hospital across the highway from Forest Park. For fun and entertainment, we would spend hours at the St. Louis Zoo and the Art Museum since

Chair Parts

Image
After searching on the internet for 2 hours yesterday, I finally found a place where I can order the spring straps that I need for the vintage rocker. I'm really anxious to get the reupholstering project done so I can move on to other jobs. I'm still searching for a set of night stands for the bedroom and an area rug. Then it's on to projects waiting in other parts of the house. Rooms need painting, bathroom floors need replacing, hardwood is waiting to be installed in living and dining room, etc.

Reupholstering Vintage Chairs

Image
I started reupholstering the vintage chairs today with my Grandmother's chair as my first project. I finished the back and am pretty happy with the way it turned out. The seat is another story. This is what I found when I took off the old fabric. Several of the wires have been broken and need to be replace. That should be a difficult task, though. I just need to find the same guage wire and replace the broken pieces. You can see a clamp that DH placed on the left side for me. The wood was cracked here and he added some wood glue and clamped it to stabilize it. The new foam for the seat is cut and ready for the upholstery. It will be next weekend before I get back to this job. The photo below is of the bottom of the seat of the rocker that I just bought. The damage here is more severe and will take more work to fix. 3 of the 4 springs in the seat are broken. Two of the broken springs have had some attempts made at repair, but they aren't holding. So I have to find 3 springs

Vintage Find

Image
 While on a day trip yesterday, I stopped by an Anitque mall to stretch my legs and look around. I left with the chair on the left. The chair on the right has been in my family for ages. It was my Grandmother's chair and I've had it since the late 1970's. It has been reupholstered several times, and as you can see, I'm in the process of reupholstering it now. The fabric laying on the seat is what I've chosen to reupholster the chair with. I'll have to find something to coordinate with it to reupholster the chair I just bought since I bought the end of the bolt. Finding something to coordinate shouldn't be too hard since this is a neutral color - it just needs to go with the new paint color in the room. Both chairs need the padding replaced, too. So I have my weekend project to work on. The reason I bought this chair - actually it's a rocker - is because the turnings were the same as what my Grandmother's chair is made with. I don't know the

Sampler Blocks

Image
More blocks from Jerri's sampler quilt.

Sampler Quilts

Image
I try to quilt something different in each block of a sampler quilt. I just completed quilting Jerri's sampler quilt that is a beautiful quilt in creams. Here are a few of the blocks.

Radiating Patterns

Image
The radiating patterns on these hand-dyed fabrics are some of my favorite designs. I'm not sure why they come out with so much more pattern and definition than the other fan-fold techniques I use, but they seem to. Once again, these were dyed with some of the custom mixed colors. I now have a large stack of these hand-dyed fabrics. The question is what to make with them.

Saturday Sampler Blocks

Image
I was behind on the Saturday Sampler blocks, but finally got caught up with the traditional set. Now, the bright set is another story! I believe we have one more block to go, and we'll get the setting kit in October.

Custom Colors

Image
For my last batch of hand-dyed fabrics, I decided to try custom mixing some colors. These were basic mixes of equal parts of 2 colors. In the fabric above, I mixed equal parts deep purple and fuchsia. This fabric is using a mix of turquoise and forest green. This piece uses the turquoise/forest green mix, deep purple/fuchsia, as well as a lemon yellow/deep orange mix.

Longarm Tools

Image
At MQS this past May, I bought an arch guide ruler from Linda's Electric Quilters booth to use with my longarm machine. I haven't used it much since then, but this quilt I recently completed had great negative space in the alternate blocks to create a quilting design with the ruler. This is the design I choose for the quilt. On the pieced block on the right, you can see where I drew out the quilting lines with chalk. I like testing out an idea with chalk first before quilting it if at all possible. I tested both sides of the ruler to decide which would work best with the quilt. I like this design, but felt it left too much area unquilted in the center of the block.

Dyeing Unbleached Cotton

Image
This latest batch of hand-dyed fabrics was done using unbleached cotton. I wanted to see if the colors were less brilliant on unbleached as opposed to bleached cotton. I don't see a difference in the colors, only in the spaces that didn't take the dye. The piece above was dyed with fuchsia, turquoise, lemon yellow, and deep orange. It was fan-folded on the bias. This piece is a fan-folded piece and dyed with turquoise, yellow, fuchsia, deep red, and lemon yellow. Another fan-folded piece. It is dyed with lemon yellow, deep orange, fuchsia and turquoise.

Use for Hand-dyed Fabric

Image
I decided to use some of the hand-dyed fabric I recently made to make a new purse. This purse used 2 fat quarters for the outside. I used a piece of commercial batik for the lining, and a piece of white muslin for the innerlining. The pattern is Simplicity 2396.

Overdyed Fabric

Image
These are 3 of the fabrics that I overdyed. All of them had too much white in them. I had experimented with dyeing 2 pieces of fabrics layered together and these were the fabrics on the bottom and the dye didn't soak through enough for my taste. Next time I try this method, I'll have to remember to use more dye. Turquoise, Fire Red, Bright Yellow. Fire Red, Deep Orange, Bright Yellow, and Deep Green. To overdye the fabrics, I soaked them in Soda Ash solution once again, wrung them out, refolded them and placed them in their dye containers. Then I applied the dyes to the areas that were still white and added dye to some of the areas that were already dyed to deepen the color. This is one of the overdyed fabrics that really deepened in color.