Longarm Binding Tutorial
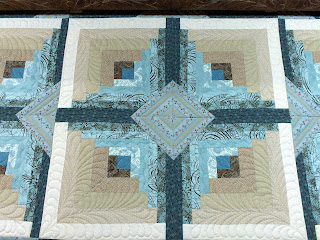
I just finished a quilt today where I applied the binding with my longarm machine and decided to take photos while I worked.
I learned to apply binding with my longarm several years ago after lots of trial and error. Over time I've fine-tuned my technique and thought I would share.
I start about 12-15 inches down from the top right corner of the quilt. The binding is cut 2 1/4" wide and folded in half and pressed. I pressed a 45 degree angle at the starting end. Line up the raw edges with the raw edge of the quilt and pin in place leaving 4-6 inches free at the top. This is where the opposite end of the binding meets.
 The photo below shows how I pin the binding as I go. This is the left edge of the quilt. The pins are facing towards the center of the quilt to keep them out of the way of my ruler. I pull pins out as I stitch.


All that's left is to take the quilt off the machine, turn the binding to the back and hand-stitch it down. You could also machine stitch it down if you like. I have customers who want to do the hand work themselves so I apply the binding to the front for them, then they stitch it down. For me it's easier than applying the binding on a domestic machine, although that is what I do for show quilts.
I learned to apply binding with my longarm several years ago after lots of trial and error. Over time I've fine-tuned my technique and thought I would share.
I start about 12-15 inches down from the top right corner of the quilt. The binding is cut 2 1/4" wide and folded in half and pressed. I pressed a 45 degree angle at the starting end. Line up the raw edges with the raw edge of the quilt and pin in place leaving 4-6 inches free at the top. This is where the opposite end of the binding meets.
 The photo below shows how I pin the binding as I go. This is the left edge of the quilt. The pins are facing towards the center of the quilt to keep them out of the way of my ruler. I pull pins out as I stitch.
This photo shows me using my Arch Angel ruler as a guide for my hopping foot to assist in attaining a 1/4" seam.

I stitch within 1/4" of the corner of the quilt, tie off and form the miter. I pin it in place, then pin the rest of the binding down as far as I can go. This is the top of the quilt so I pinned the binding all across the top. When I start stitching the miter down, I start 1/4" in from the miter. This gives me some ease when I'm hand stitching down the binding to the back of the quilt. It makes it easier to get those perfectly square corners that we quilters like.

When I reach the beginning of the binding, I tuck the end into the beginning folded edge and trim the excess binding. I pin the 2 ends down to the quilt after smoothing out any wrinkles or bubbles, then stitch the seam. I leave the 45 degree seam open and hand-stitch it together after I take the quilt off the machine. I used to try to stitch the binding ends together with the longarm, but that was way more work than I wanted to do. It was too difficult to get a smooth seam.

All that's left is to take the quilt off the machine, turn the binding to the back and hand-stitch it down. You could also machine stitch it down if you like. I have customers who want to do the hand work themselves so I apply the binding to the front for them, then they stitch it down. For me it's easier than applying the binding on a domestic machine, although that is what I do for show quilts.


Comments
Great visuals! Thank you. I've never applied a binding with my longarm and I've had it for 9 years. :(
I have a question though. I've always been taught to start right at the edge after a miter to get perfectly square corners. Don't you have a hole in the corner if you start 1/4" in?
Thanks,
E